Is there a demo?
Here is a demo:
What touchpoints do you support?
Here is what we support:
- Sync orders as sales orders to Acumatica.
- Sync customers from your selling channel to Acumatica.
For other touchpoints, contact us.
How do fields map for sales orders to Acumatica?
Here is a list:
| Acumatica | Connex |
| Order Type | Hard coded to SO for sales order. |
| Order Nbr | Uses auto generated number. Contact us. |
| Status | Not mapped, can be mapped. Contact us. |
| Date | Order Date |
| Requested On | Order Date |
| Customer order number | Order number |
| Currency | Currency |
| Customer | Matches by name or company. |
| Phone | Phone |
| Billing address | Billing address |
| Shipping address | Shipping address |
| External Ref. No | Contact us. Not mapped. |
| Total Discounts | Discount |
| Total Tax | Contact us. Not mapped yet. |
| Order Item - Inventory ID | Matches to product SKU. |
| Warehouse | Hardcoded to main. Can be changed. Contact us. |
| Line Description | Line Description |
| Quantity | Quantity |
| Unit Price | Unit Price |
How do I connect Acumatica and Connex?
Here are the steps:
Register your app with Acumatica
1. Create a new app
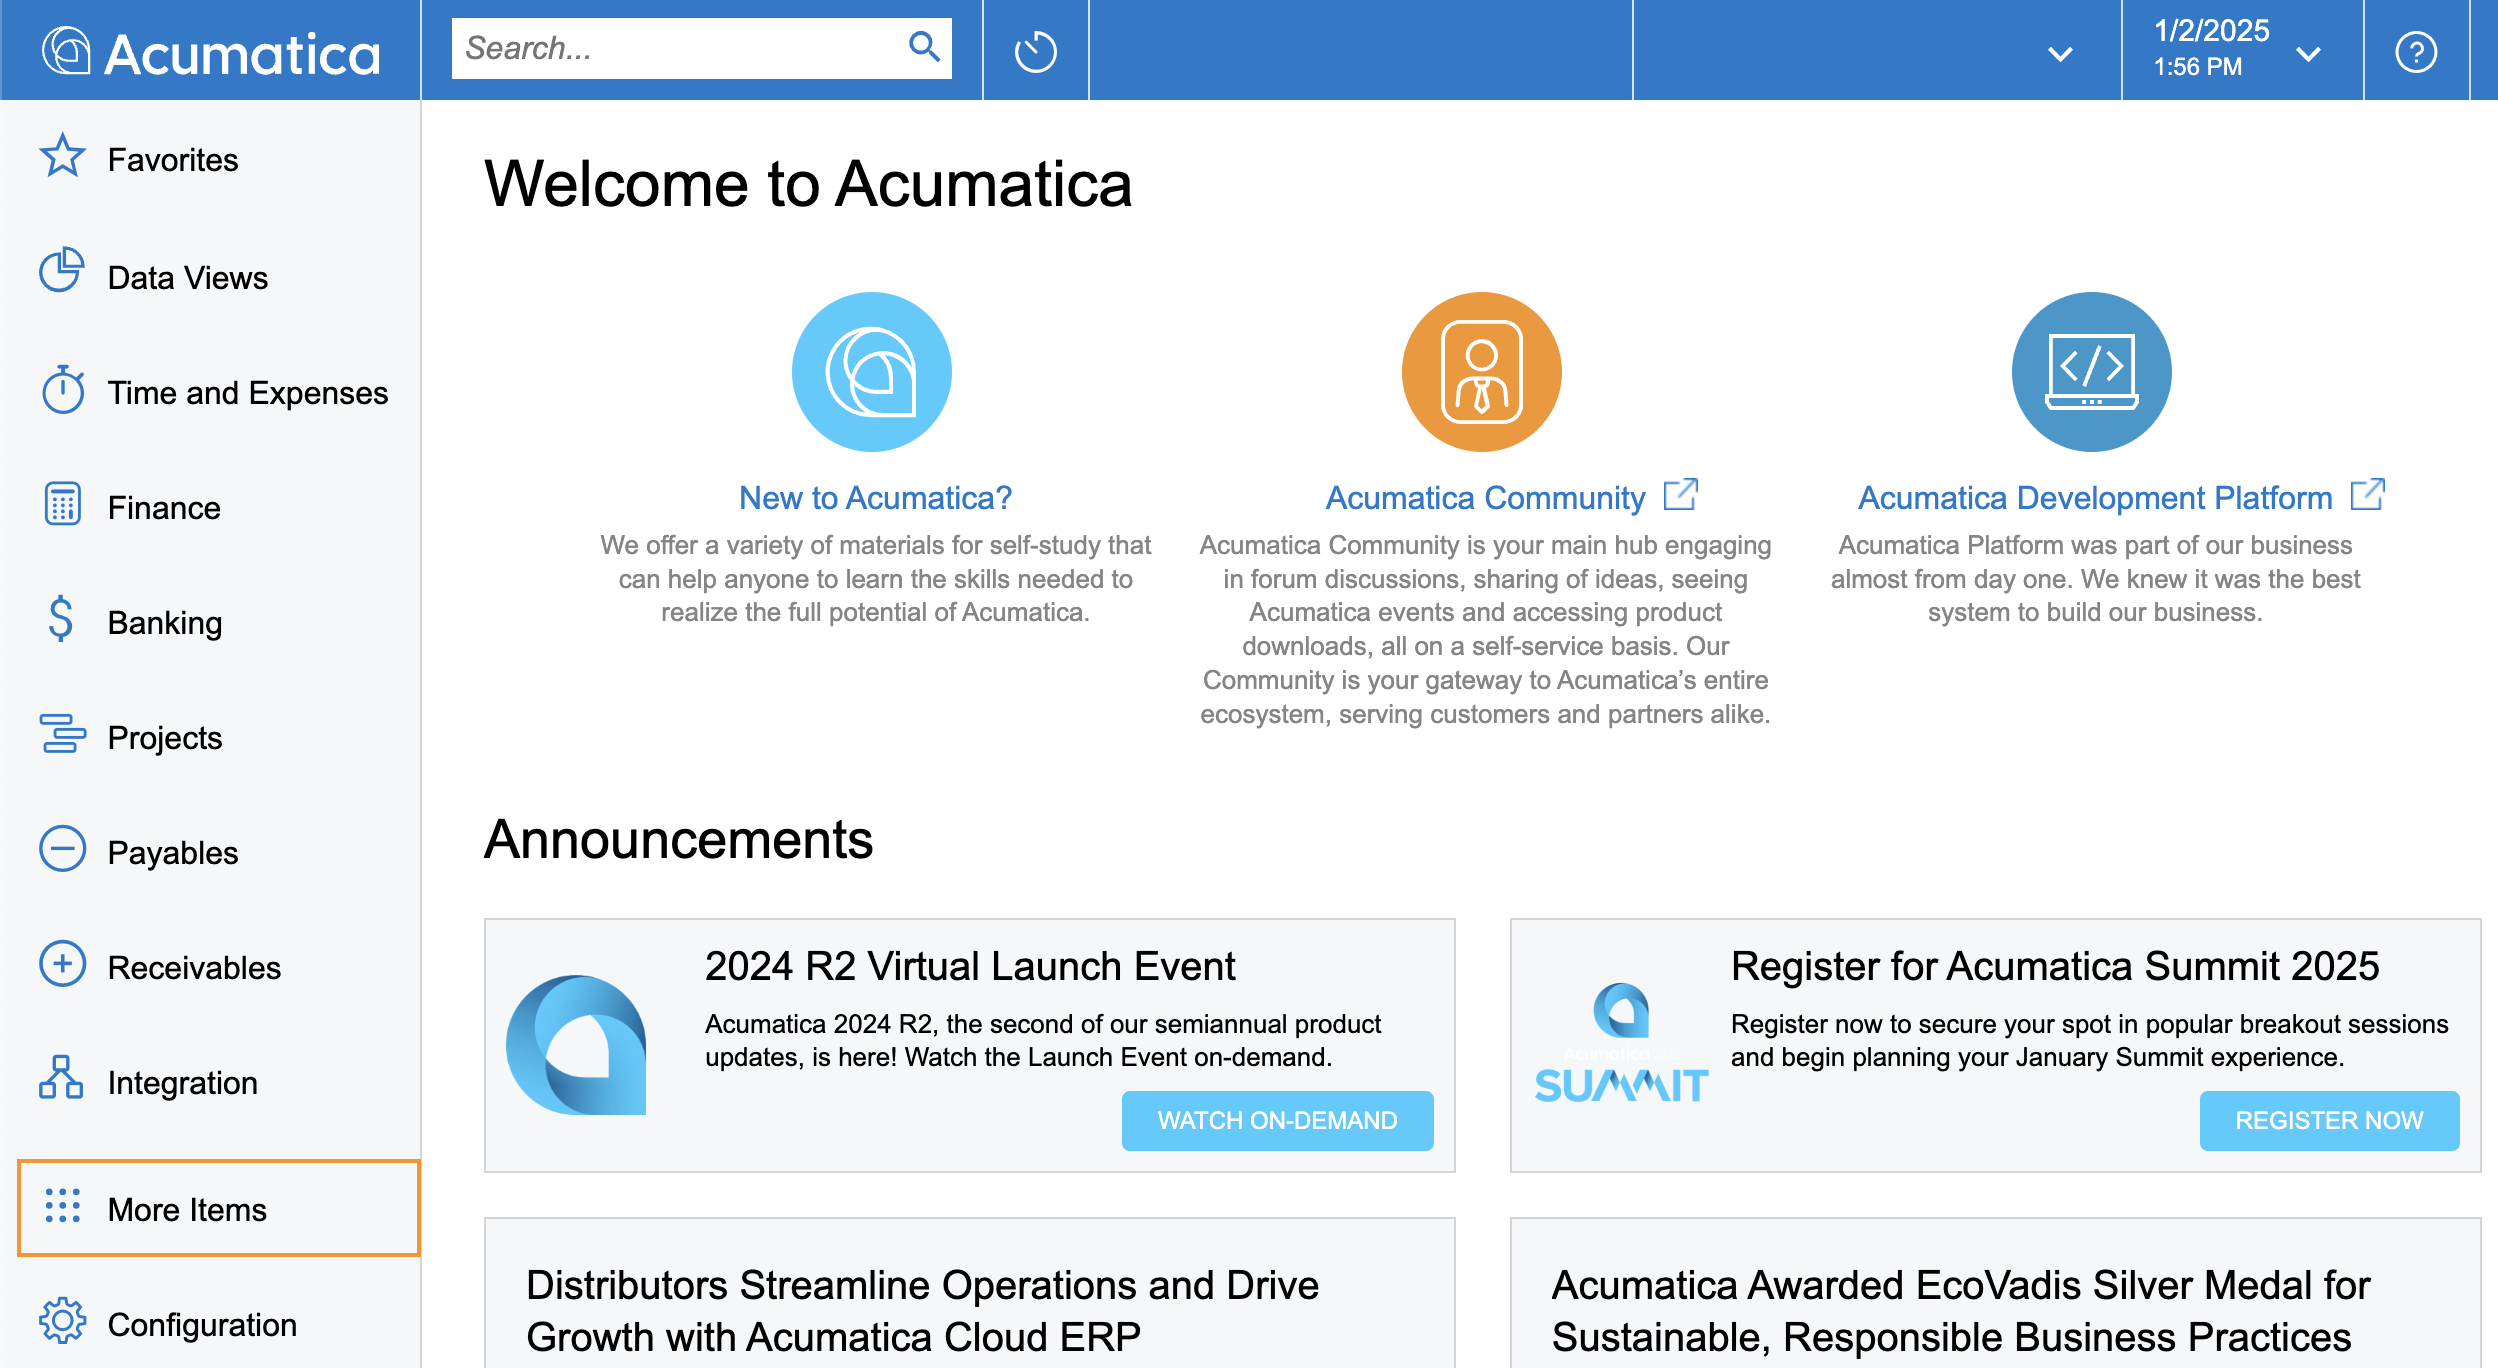
Login to your Acumatica account and go to the "Integration" page from the navigation menu.
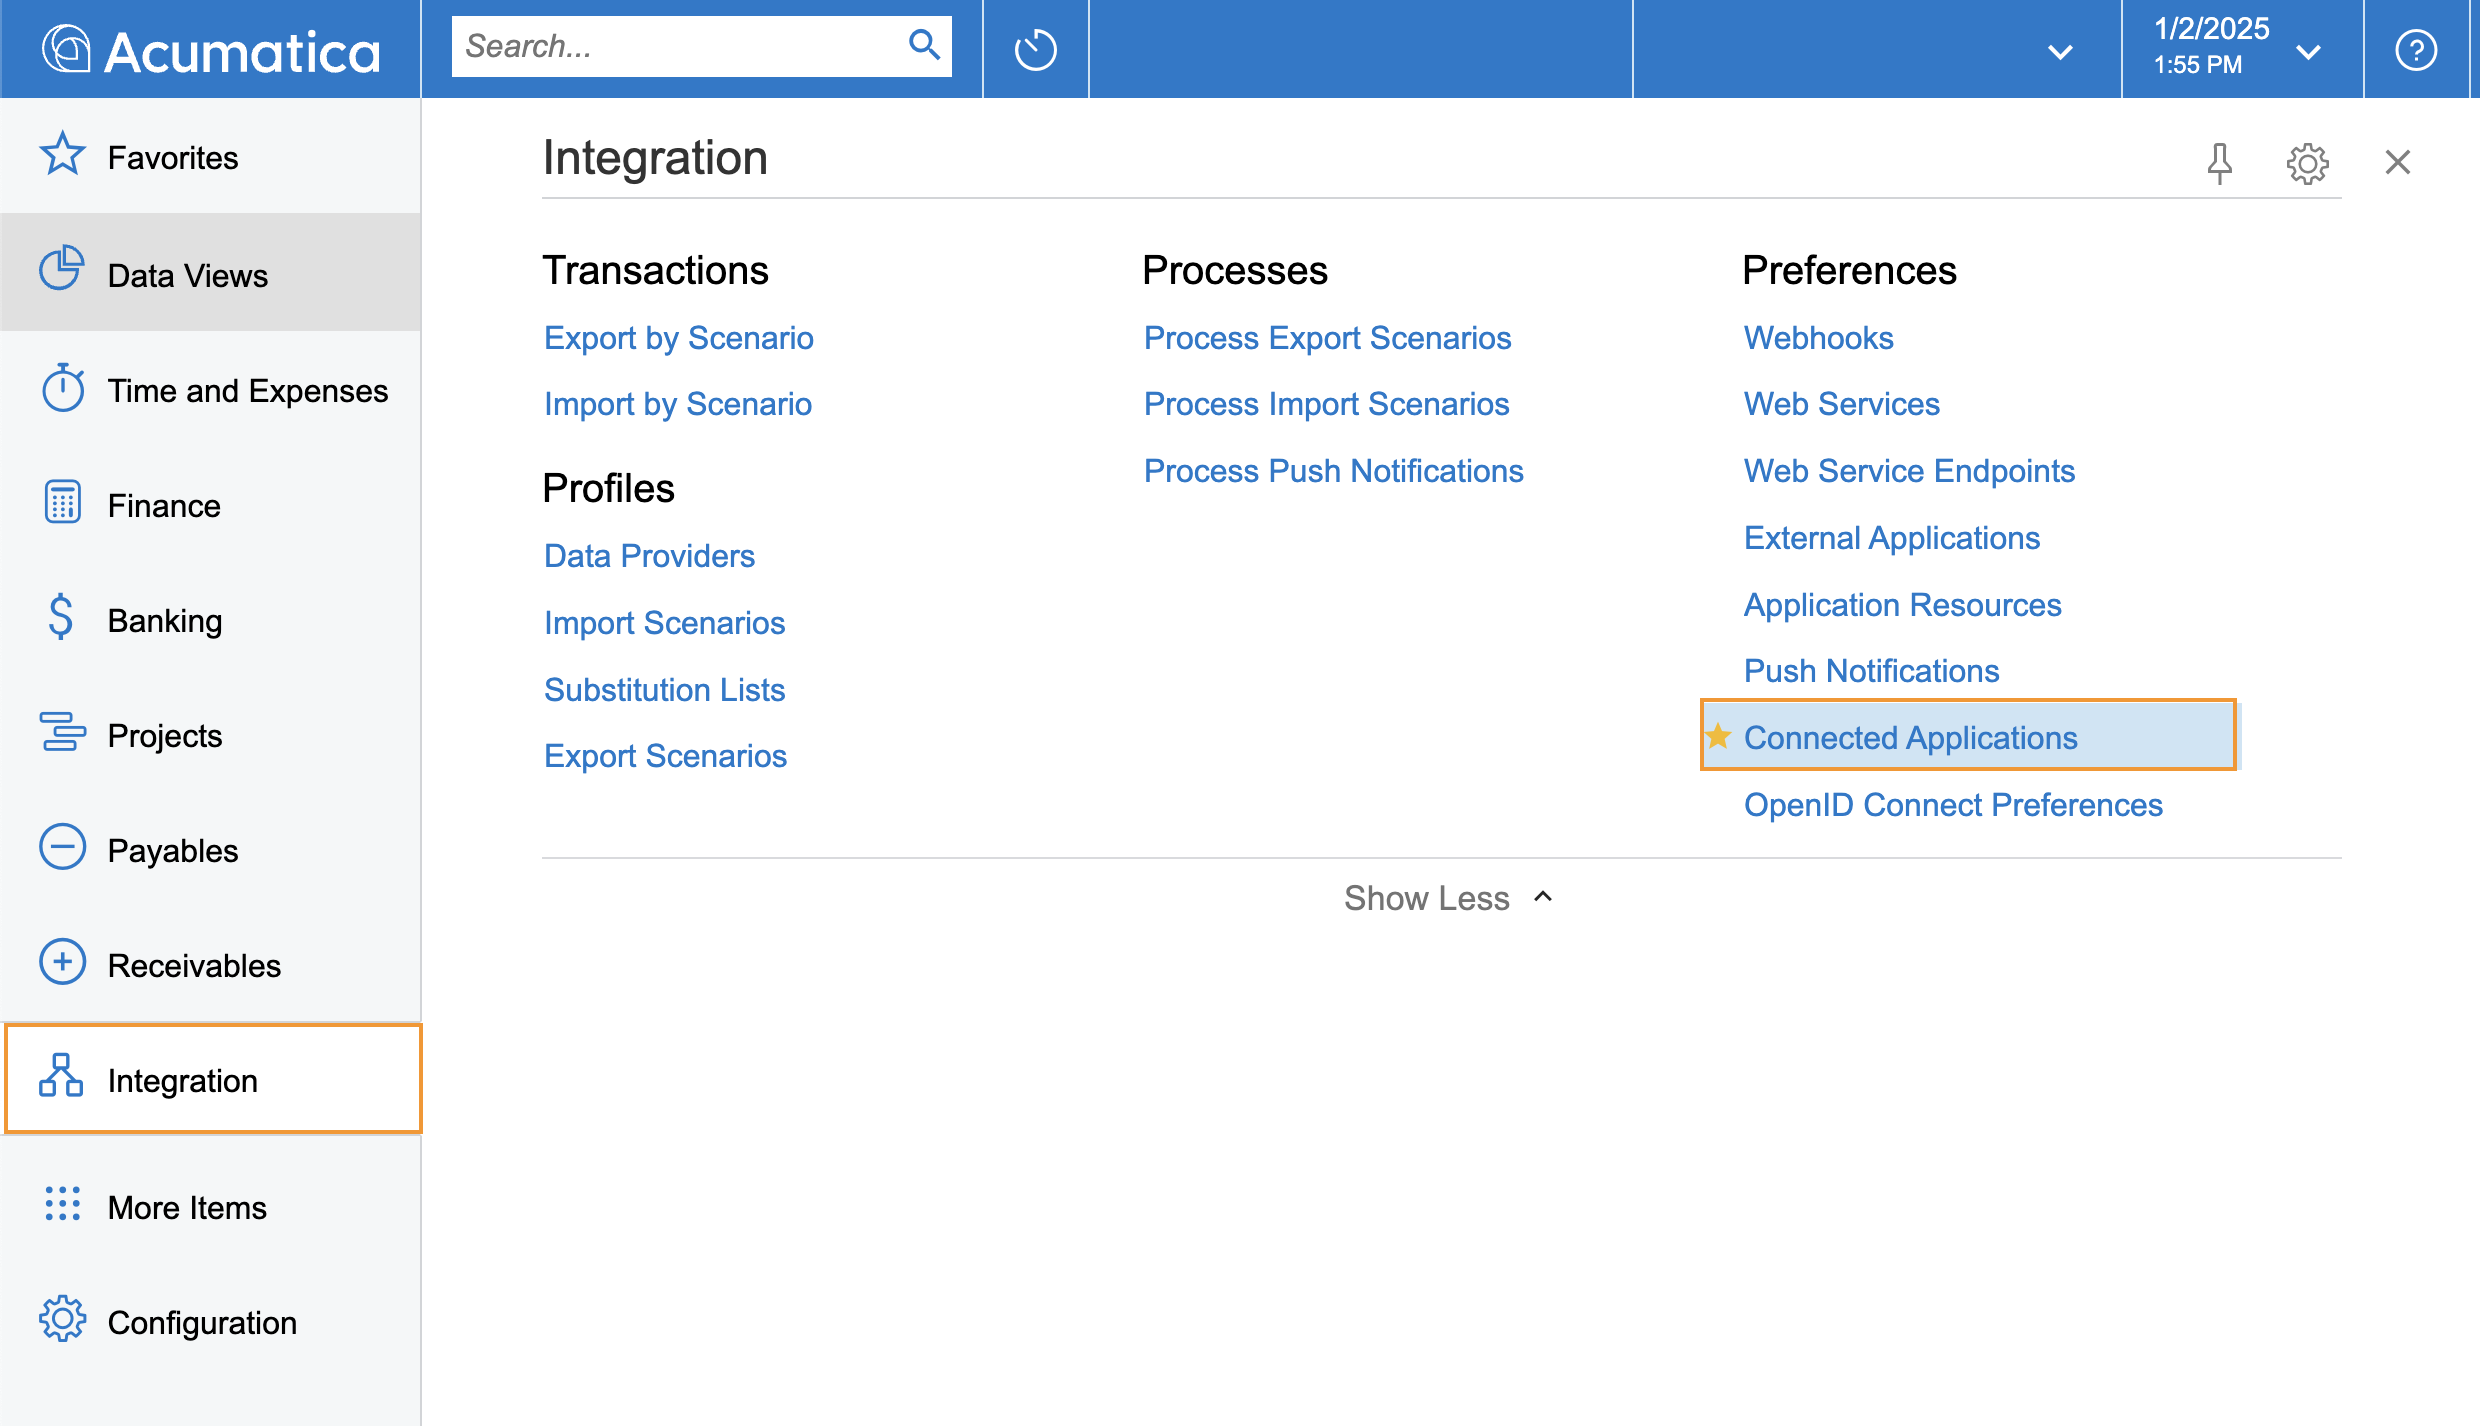
If you can't find the Integration page, you can click on "More Items" and then click on "Integration" from the menu.
Now click on the Connected Applications under the "Preferences"
2. Enter app details
Enter your application's registration information:
- Client Name - Enter a meaningful application name that will be displayed to your users. Most of the time, this should be your company's name.
- Flow - Select Authorization Code
- Refresh Tokens - Select Sliding Expiration and Infinite on Absolute lifetime. Enter 15 Days for Sliding Lifetime
- Redirect URI - Click on REDIRECT URIS and add
https://unify.apideck.com/vault/callbackas the redirect URI. This is the default redirect URI for Connex.

3. Generate Client Secret
Next to redirect URIs, navigate to the SECRETS section and click on Add shared secret
Add a description and select an expiry time.
Note: Select a long expiry time to avoid having to re-authorize the app with new credentials in short periods of time.

4. Generate Client ID
Click on the save icon to generate a new Client ID. Copy the Client ID and save it for later use.
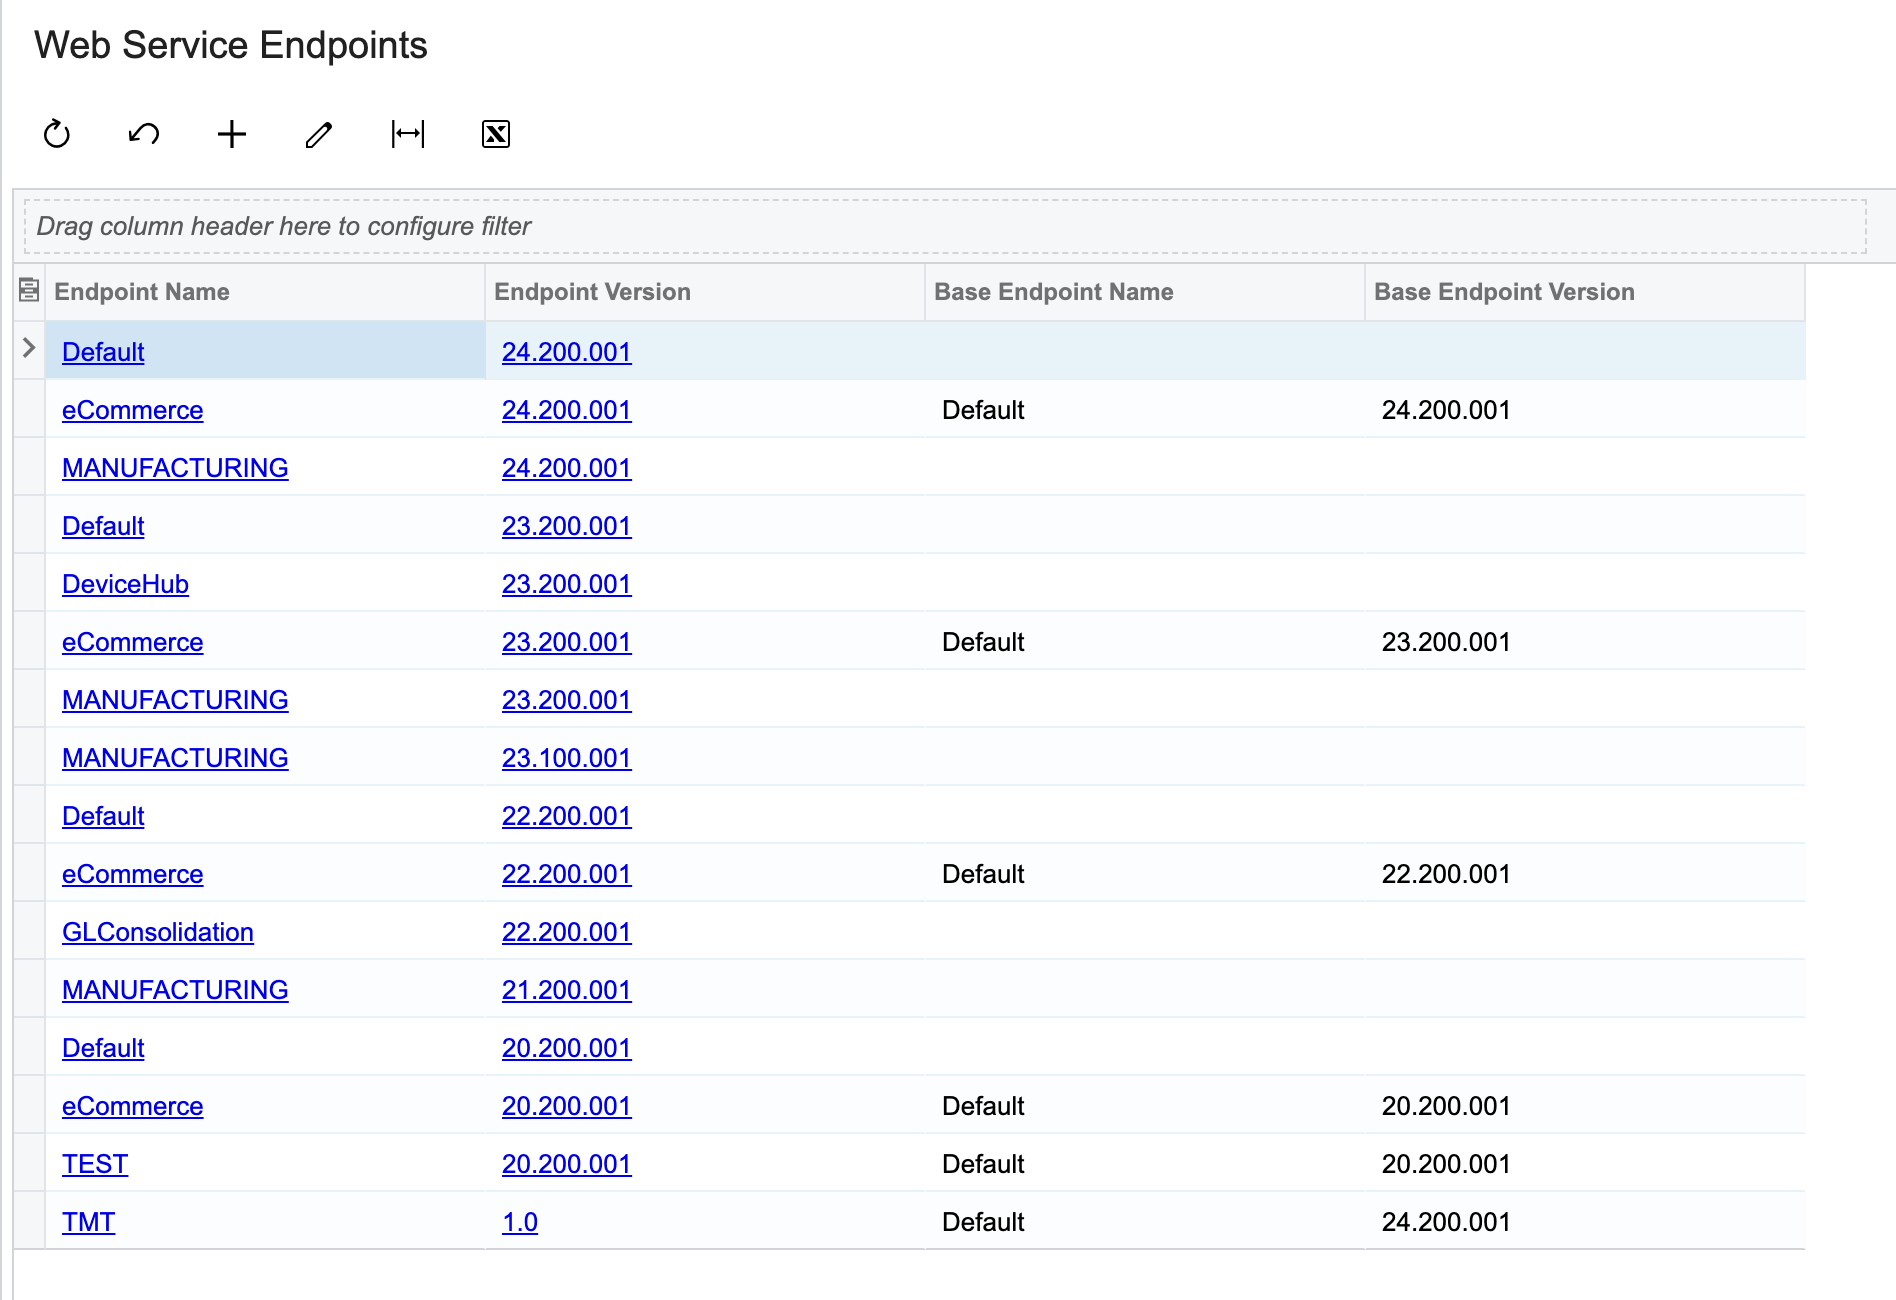
5. How to find your Instance URL
Your instance URL will be in the format: https://yourinstance.acumatica.com/entity/DEFAULT/20.200.001
Base URL of your Acumatica instance should look like below:
![]()
To find the correct version for your instance URL, navigate to Web Service Endpoints under the Integration page.
After adding your selling channel, enter your credentials into Connex.