1. First, open up QuickBooks and then go to Company > Users > Set Up Users and Roles...
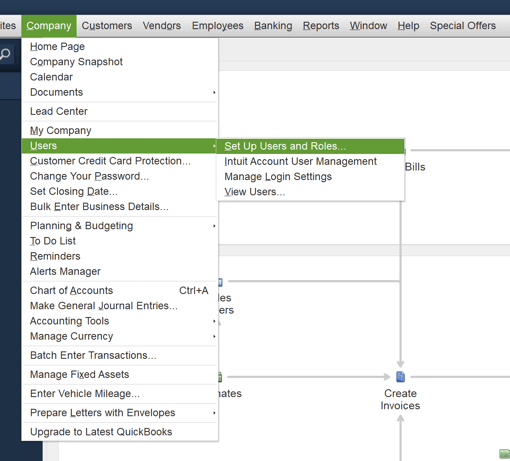
2. For existing users, select the user you wish to edit, and then click the Edit button. If you are creating a user, click the New button.
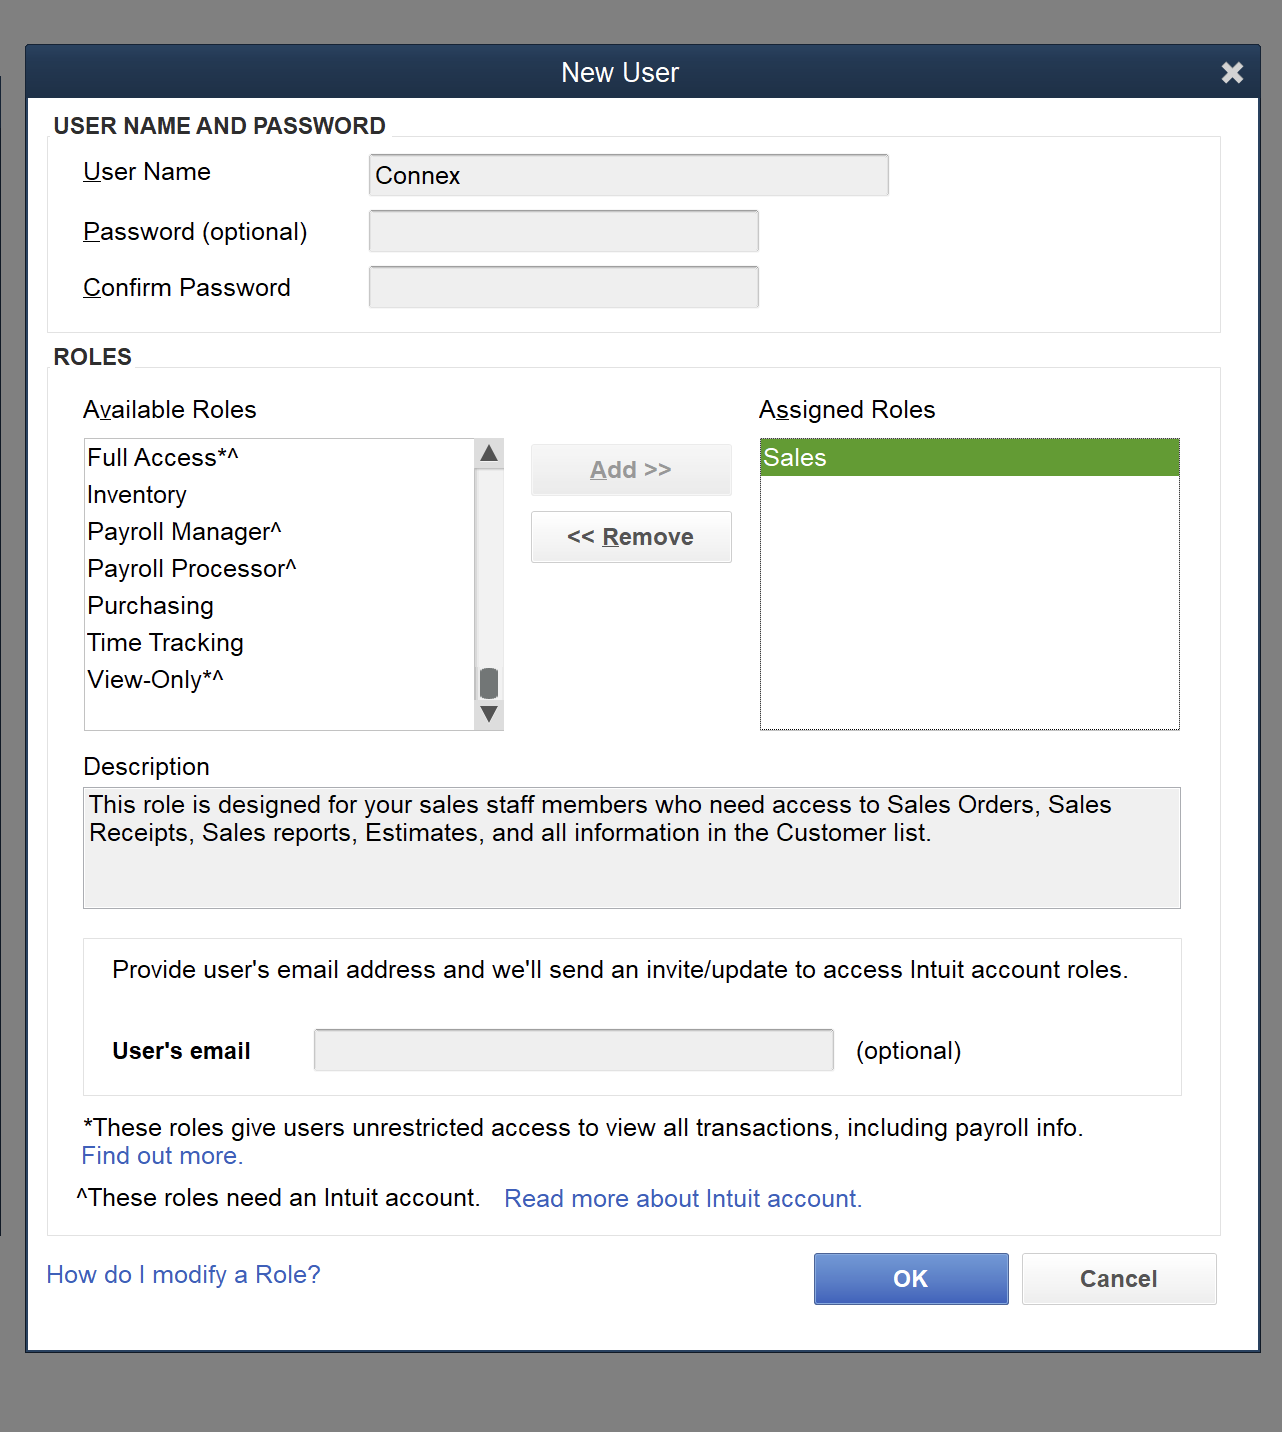
3. In the Edit User window, under the Roles section on the left, choose Sales and Add (Add >>) it to the Assigned Roles list and then click OK:
4. Close out of the Users and Roles Window. Select Edit > Preferences. In the Preferences window, select the Integrated Applications tab. Click the Company Preferences Tab at the top, and then select the Connex integration and click the Properties... button.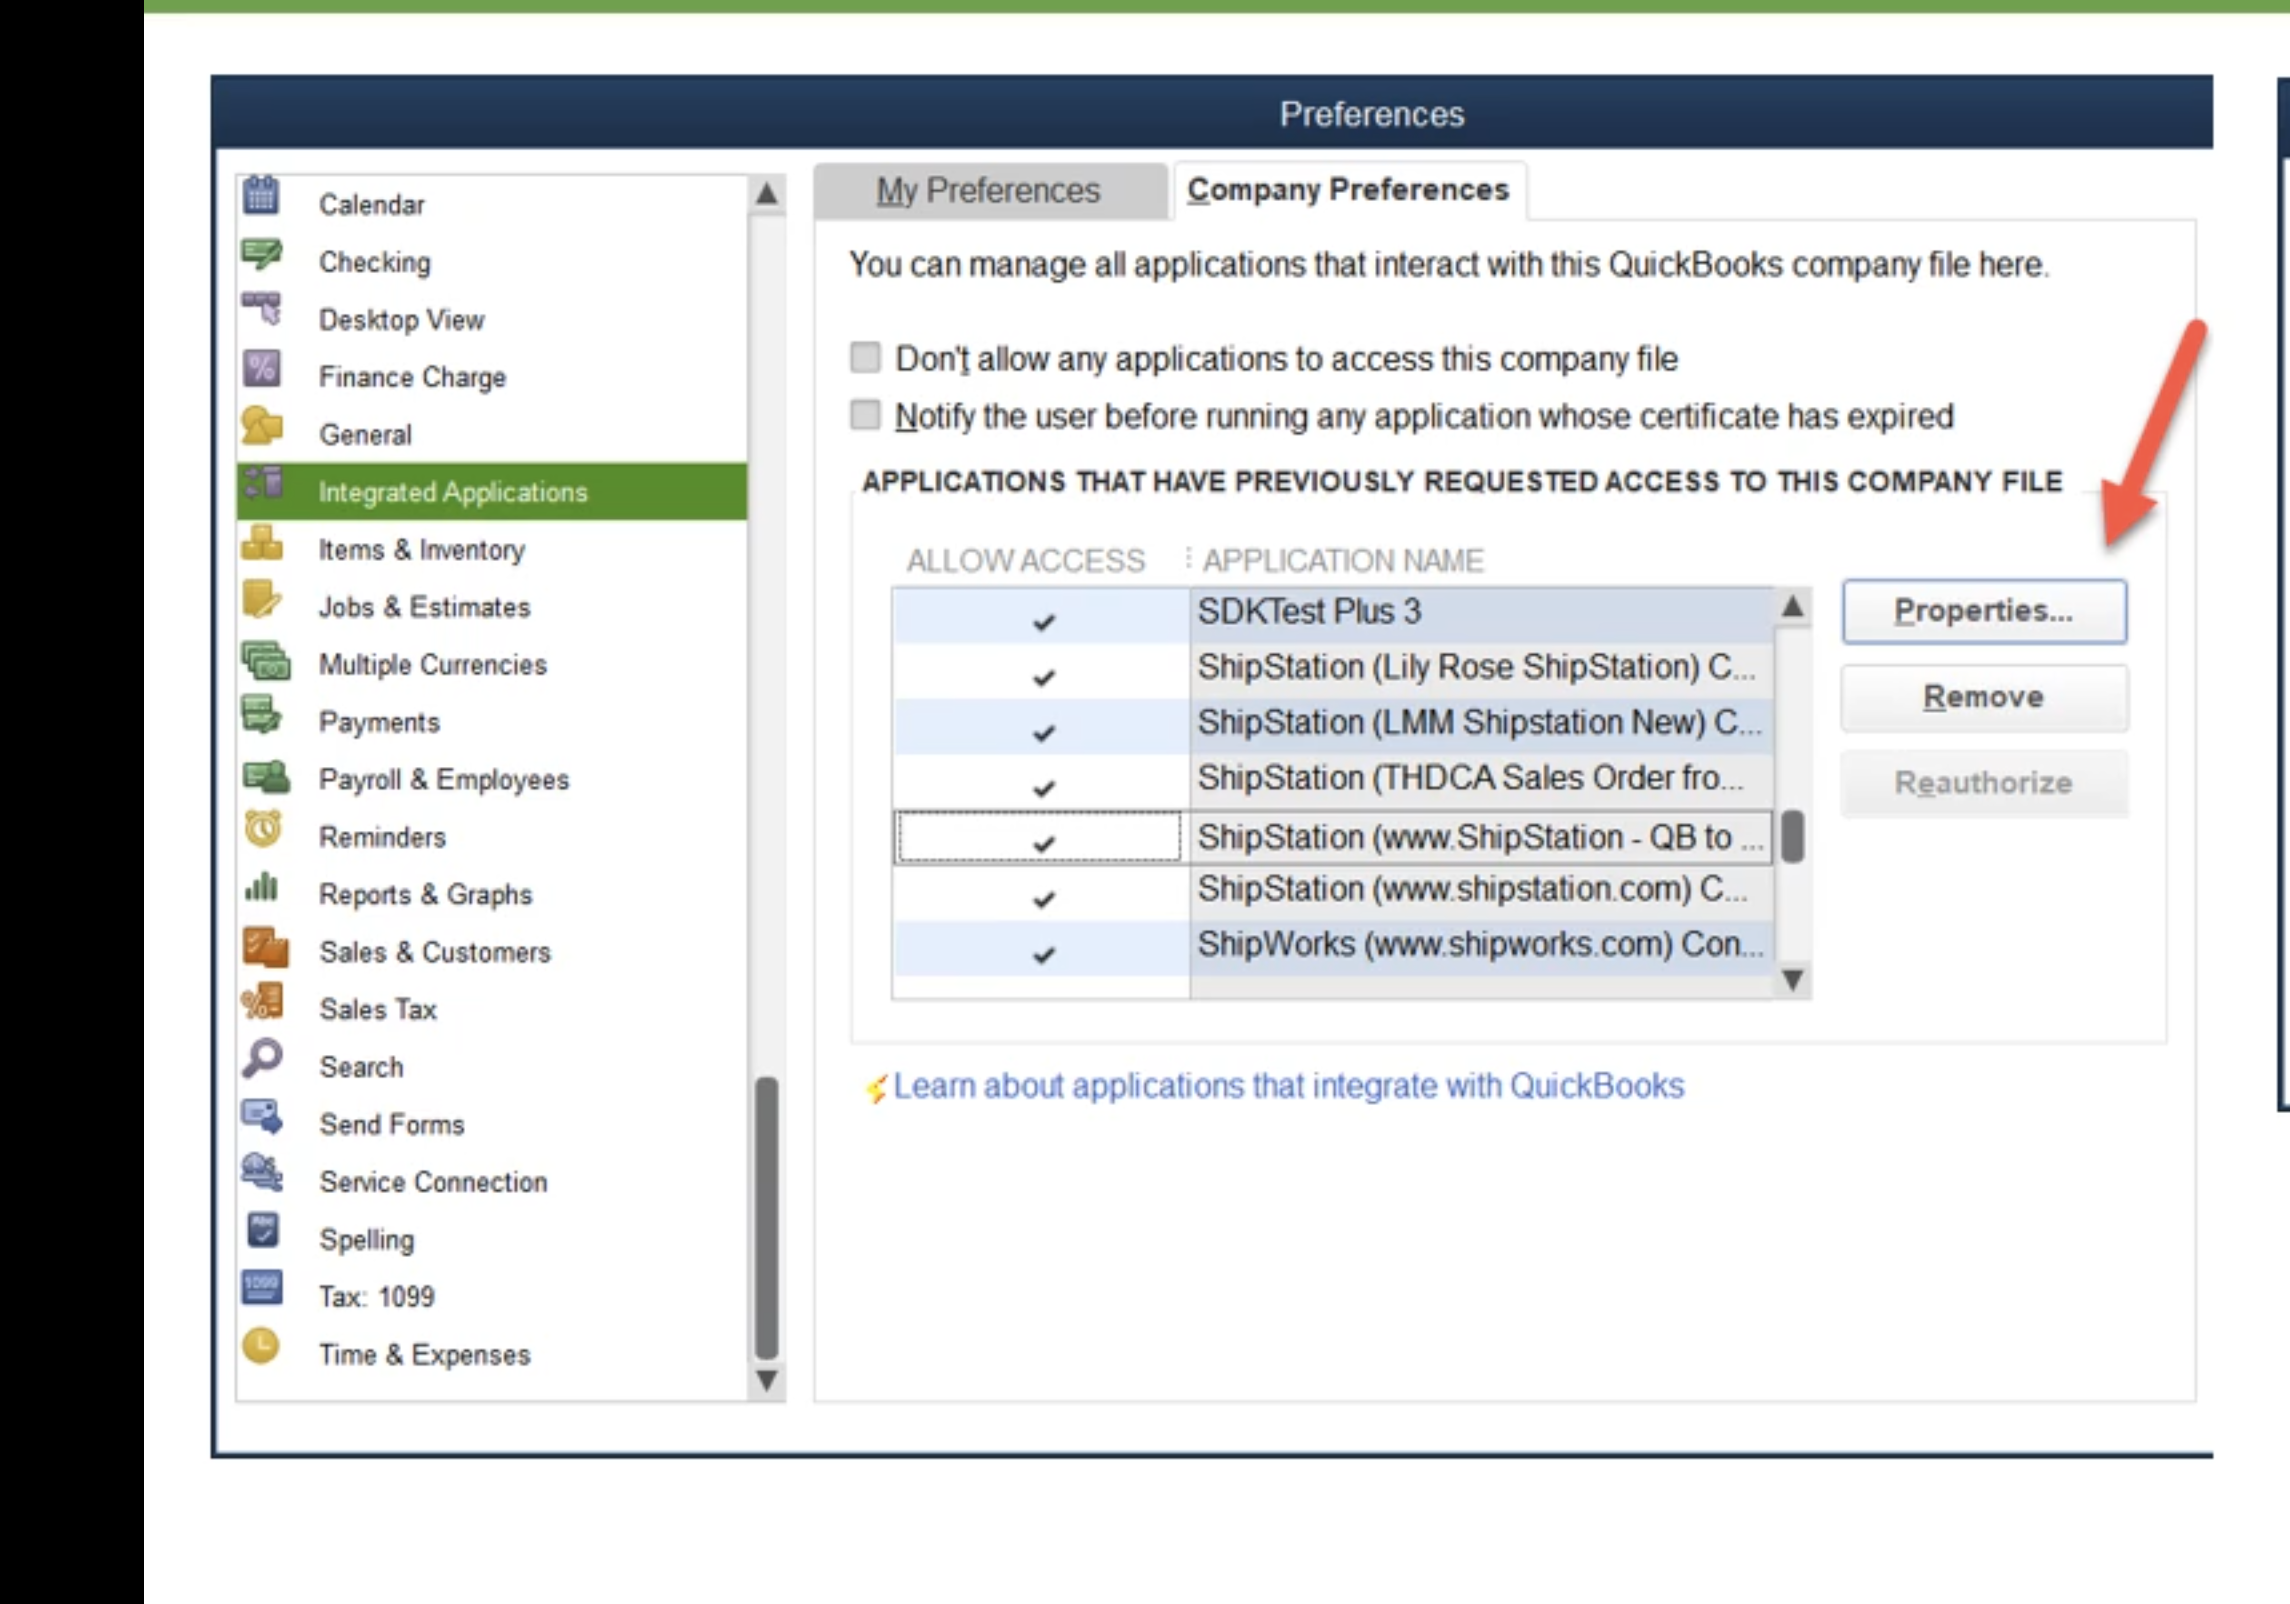
5. Make sure that to check the boxes for Allow this application to read and modify this company file and Allow this application to login automatically (This will allow Connex to sync automatically, even when your QuickBooks application is closed). You can choose Admin under Login as: (just to be safe), or you can choose the user you previously edited or created. Click OK.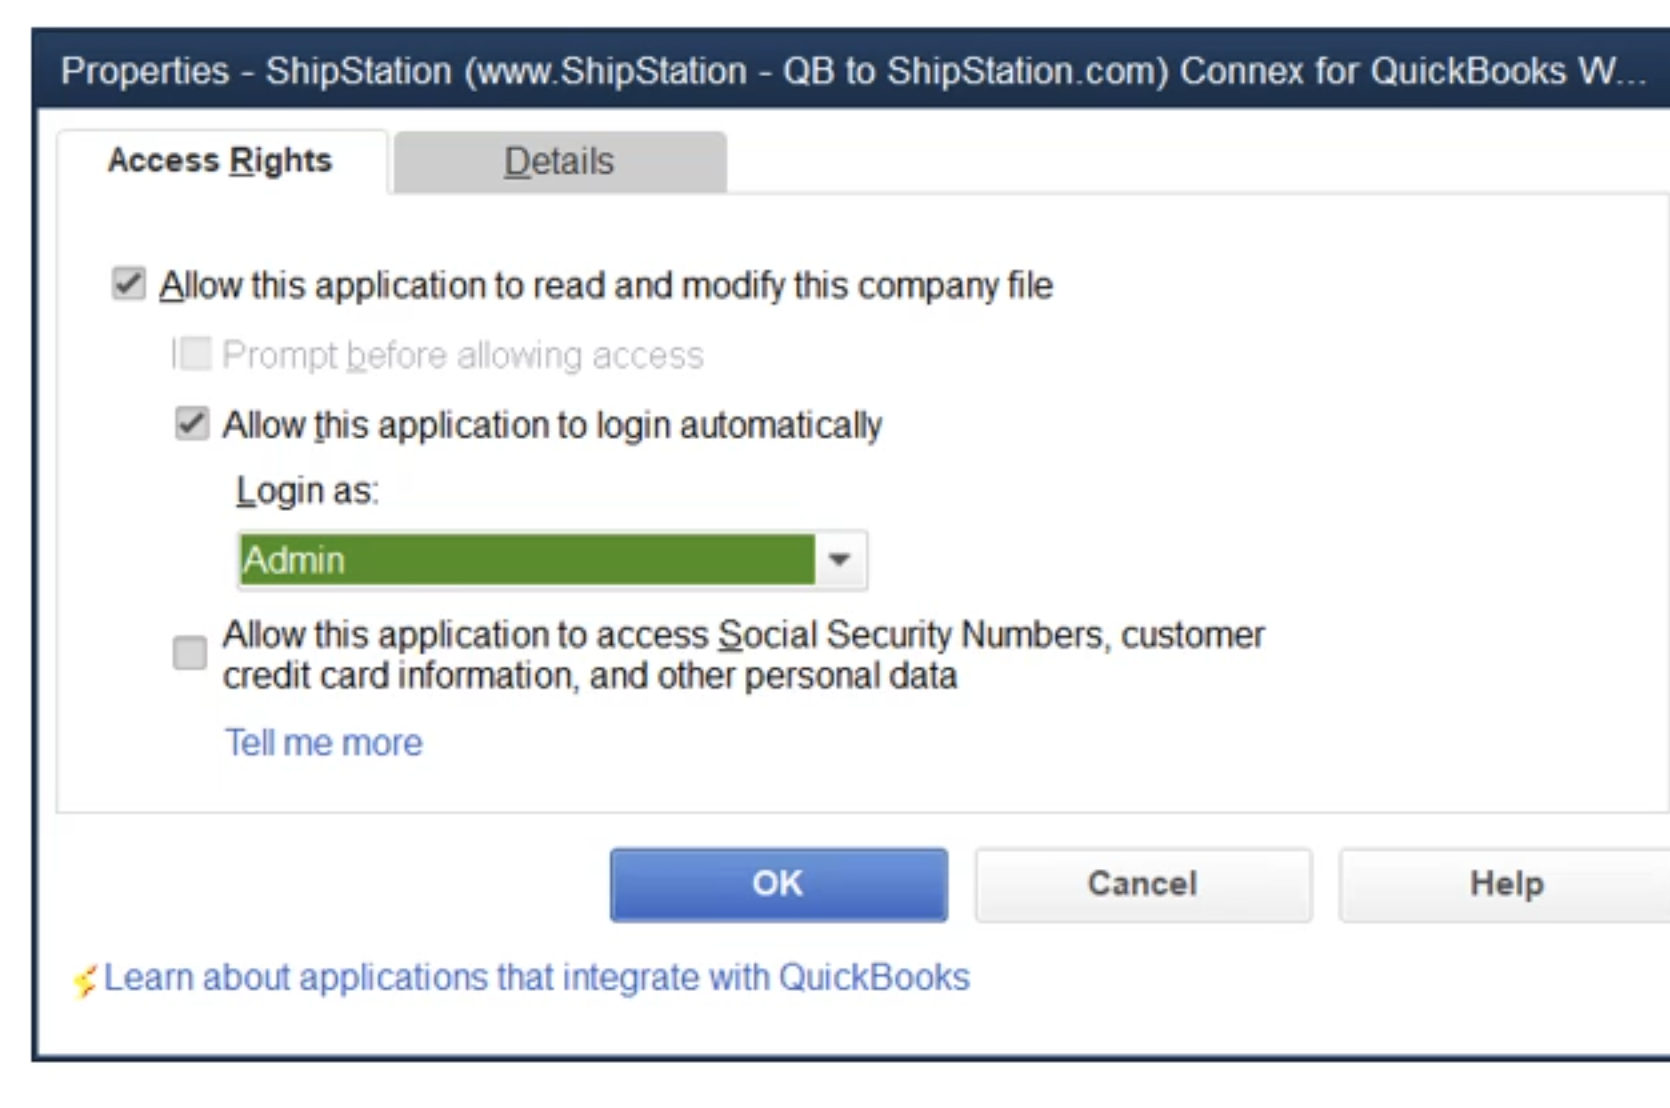
Allow permissions to create orders and customers
1. Open up QuickBooks and then go to Company > Users > Set Up Users and Roles...
2. In the Users and Roles window, select the Roles List tab at the top, select the Sales role under the Roles section on the left, and then click the Edit button.
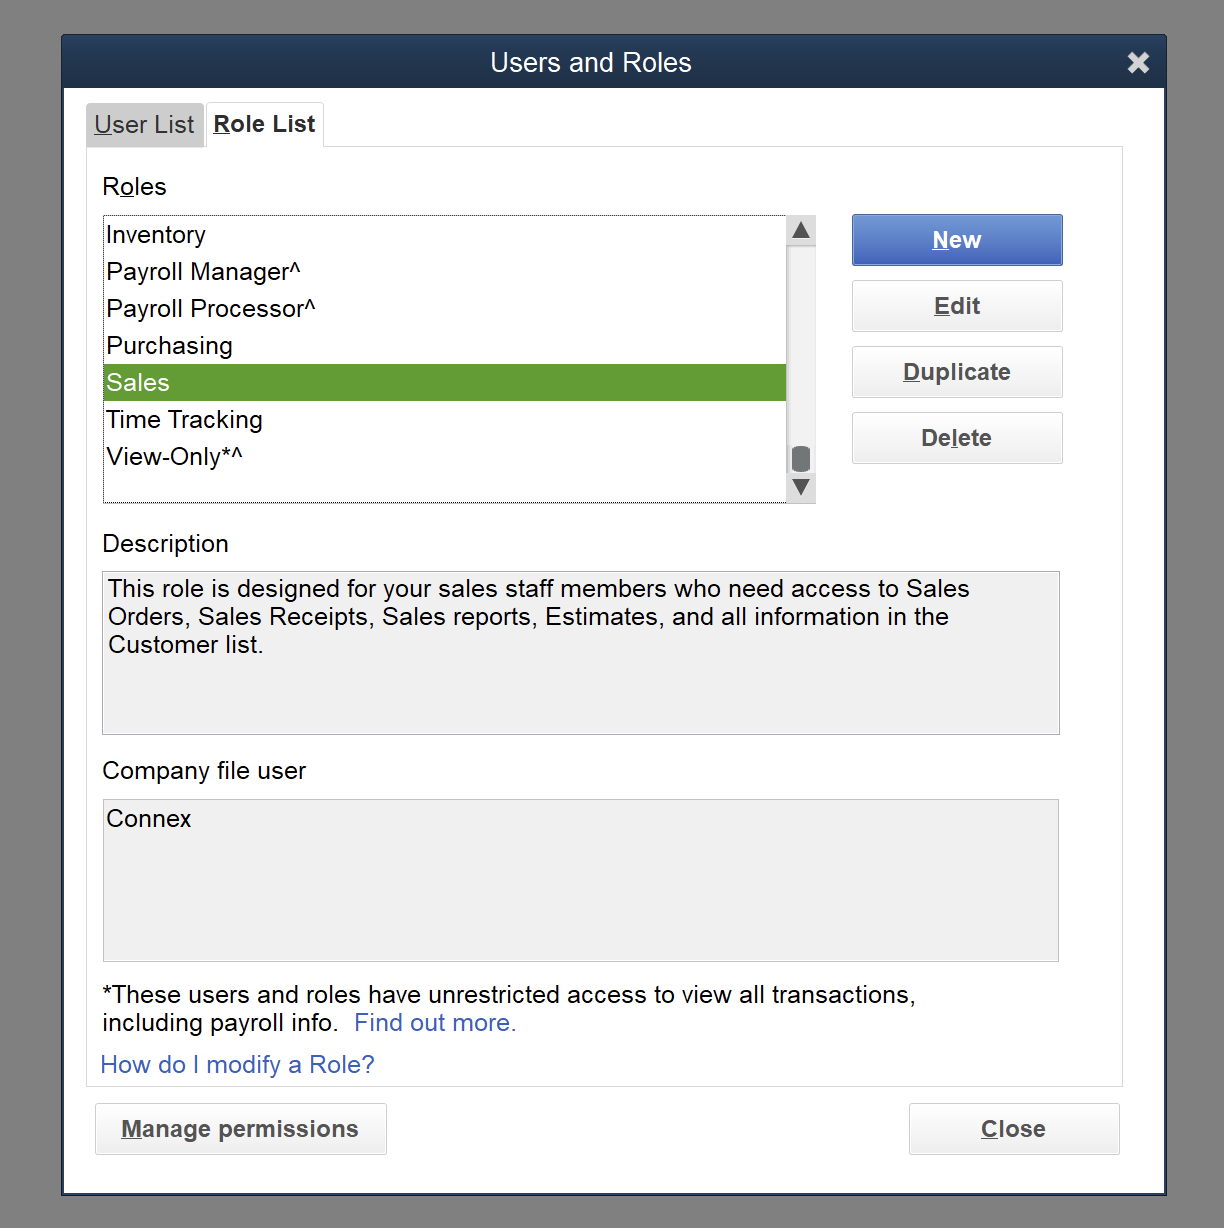
3. In the Edit Role window, expand the Lists item under the Area and Activities section of the Role Access heading. You'll then select the Full checkbox under the Activity Access Level section. This will grant the Sales role the ability to read and write (create new customers) to the QuickBooks database. Click OK to finish and then close the Users and Roles window.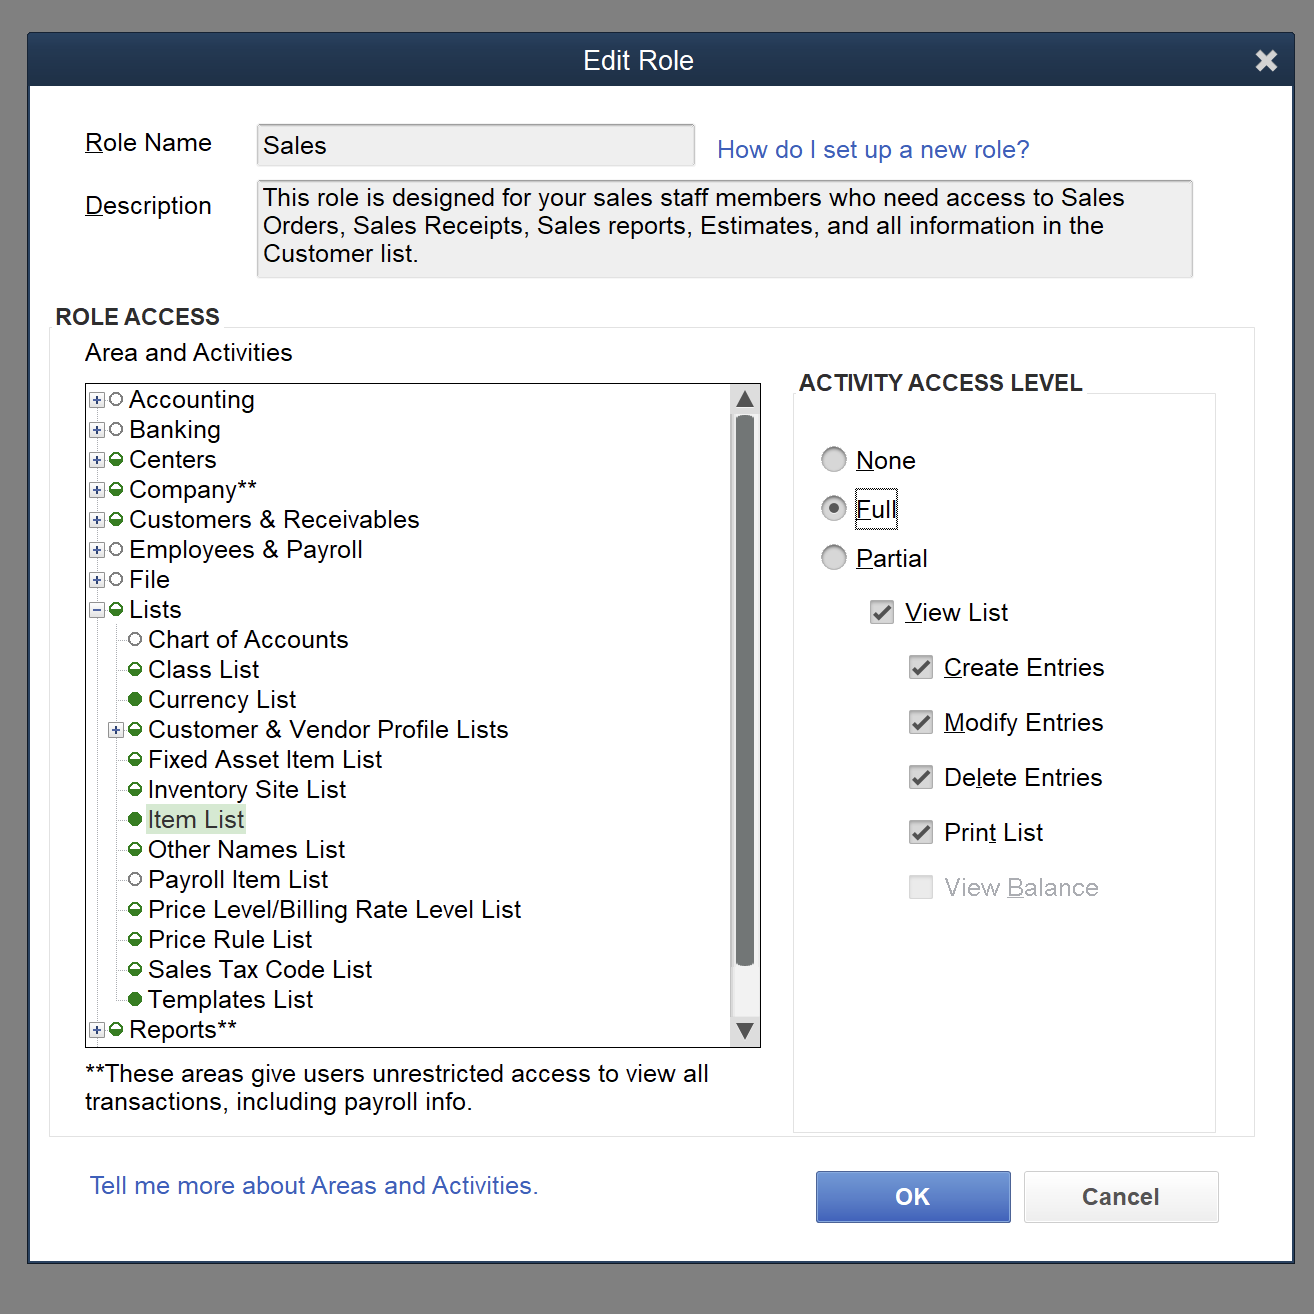
Is there a demo?
Here is a demo: