Is there a demo?
Here is a demo:
How do I install the Bigcommerce Connex integration?
Our software can be installed through API accounts area in Bigcommerce. Here are the steps:
- Login to your BigCommerce store.
- On the left, click settings.
- Scroll down and click store-level API accounts:

- Click create API account.
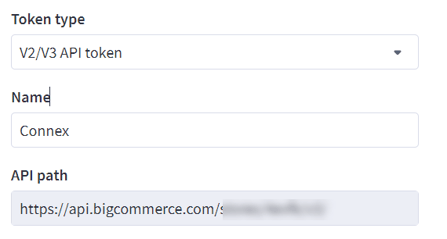
- Select create V2/V3 API token.
- In the name field, enter Connex.
- Copy the API path onto note pad. It is used later in Connex:
- You will see options that say none, read-only, or modify. Give read only access to all areas and modify access to order and product. If asked to choose between none and modify, select modify. Connex should have at least read only access to all areas of your site.

- Click Save.
- Open the text file that appears in your downloads folder:

- On a separate browser tab, log into Connex and click add new connection.
- Choose Bigcommerce
- Copy the values from the text file into Connex.
Do you support bundled items?
Our software can sync bundles in two ways:
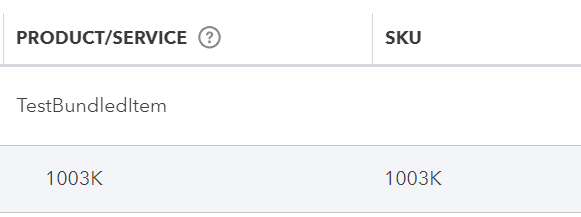
- You can sync just the parent item to QuickBooks. If you use QuickBooks bundled items, this is the recommended and default setting. Here is an example bundled item:
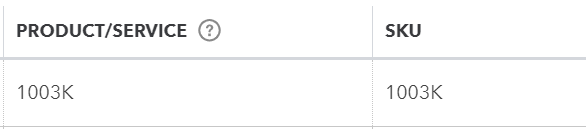
- You can sync the sub items only to QuickBooks. This setting is ideal, if QuickBooks has no bundled item. Here is how the sale would appear, if you just sync sub items:
To enable syncing individual items from a bundle, please contact us. Ask us to follow these steps:
- Create a ticket with Connex.
- Ask us to enable 'Sync bundle sub items'.
Do you sync refunds?
Yes, our tool syncs partial and full refunds from BigCommerce.
How do the fields map between BigCommerce and QuickBooks?
To view a diagram, click here.