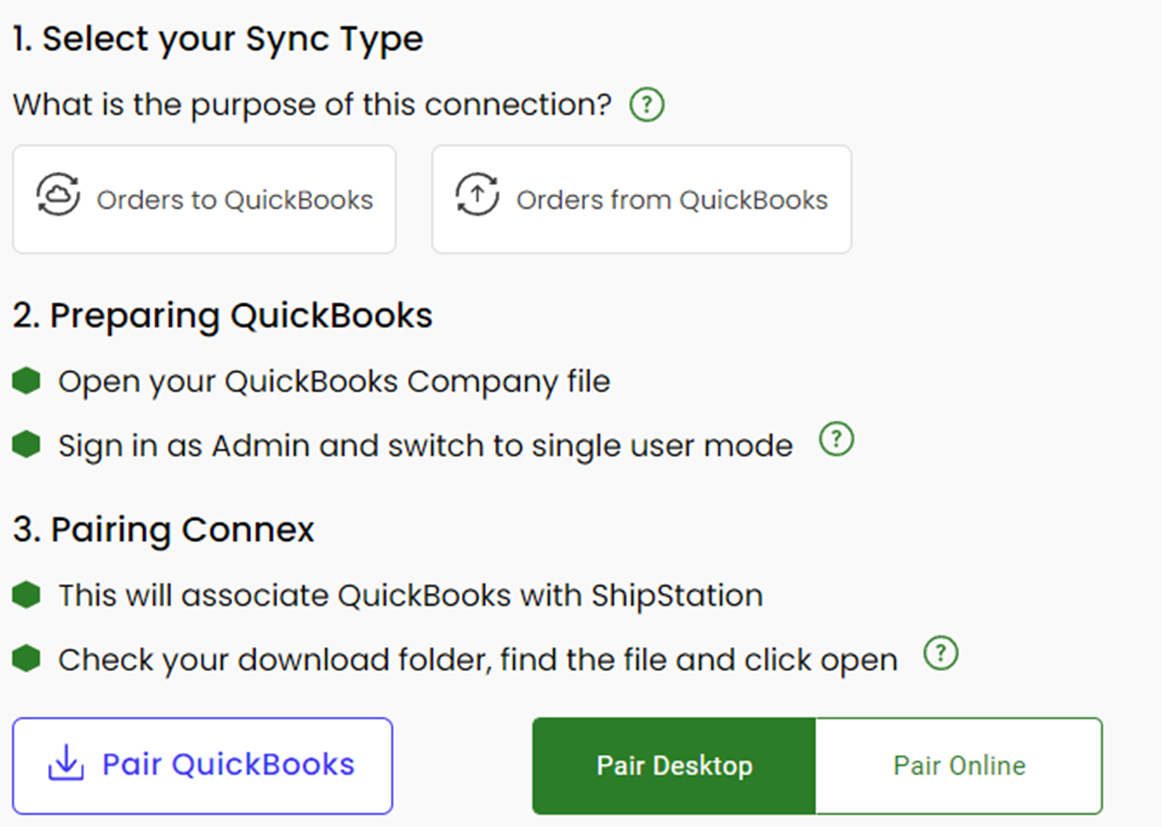
Step 1: Sync Direction
The first step of the configuration wizard begins the setup process and answers to the following questions:
- Which direction do you want to sync - orders to QuickBooks or orders from QuickBooks? Note: Some integrations are not compatible syncing sales from QuickBooks
Step 2: Sync Orders to QuickBooks
Here is a demo:
Sync Orders to QuickBooks is a feature that allows you to automatically sync your e-commerce orders with QuickBooks. This can save you a lot of time and effort, as it eliminates the need to manually enter each order into QuickBooks. you will need to configure your syncing settings. This will include specifying which orders you want to sync, how often you want to sync, and how you want to handle order updates.
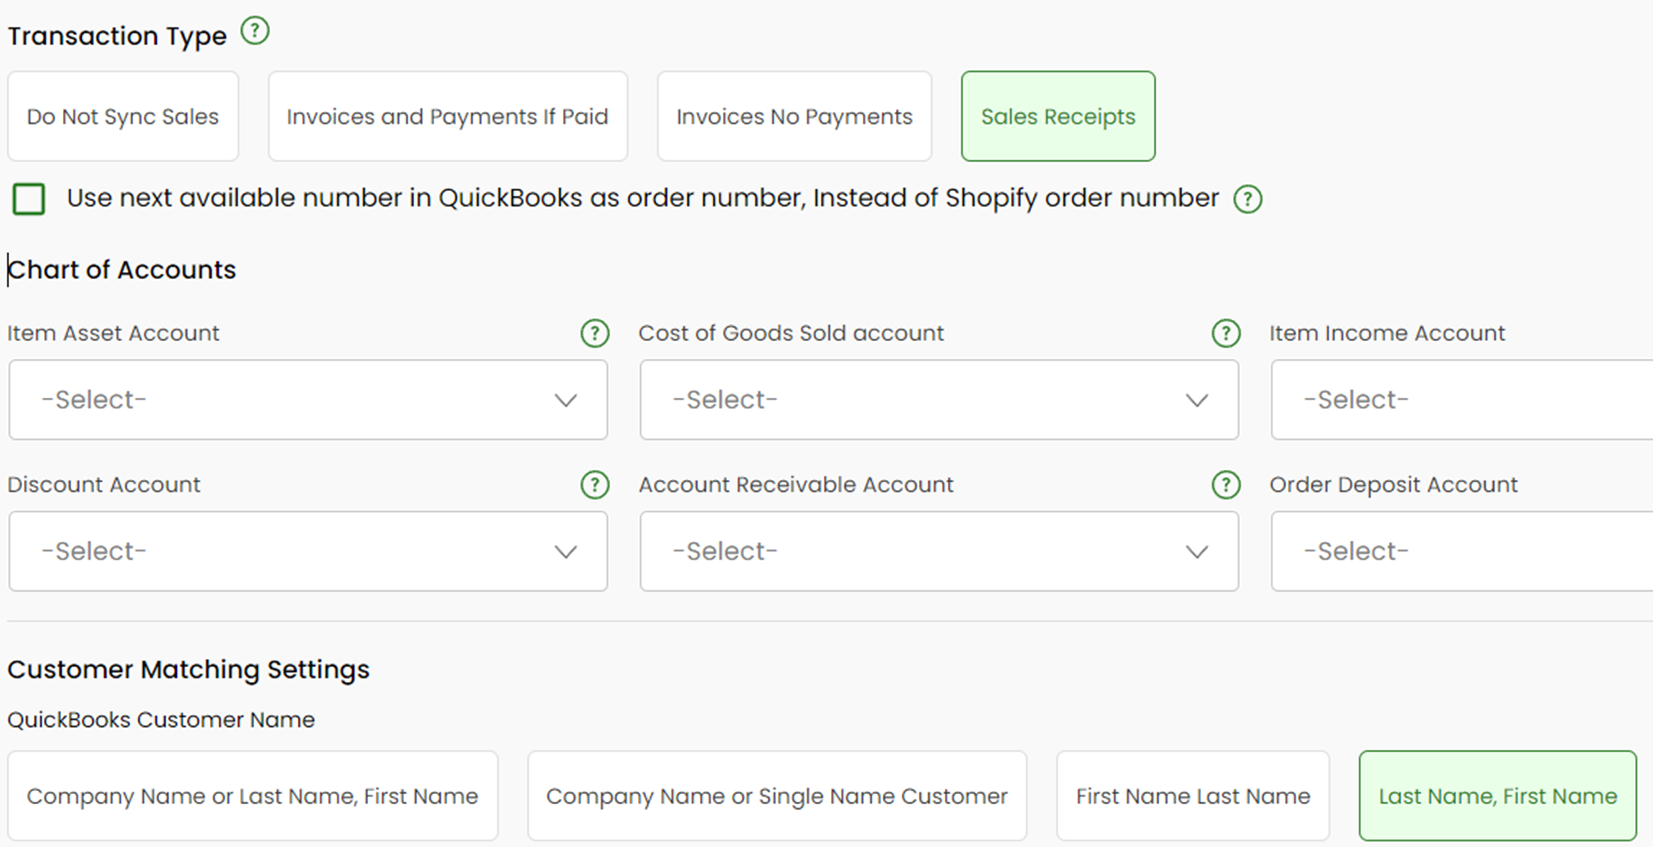
Transaction Type Settings
Allow you to specify the types of transactions you wish to synchronize in QuickBooks. Below are examples of transaction types:
-
Sales Receipts: Select this option if your transactions are typically paid in full at the time of the sale.
-
Invoices: Choose this option if you anticipate receiving payments at a later date for your sales.
-
Sales Orders: Opt for this option if you prefer not to immediately decrease QuickBooks inventory. This is applicable when items are custom-built or made to order, and you want to reserve inventory until the items are ready.
-
Sales Orders, Invoices, and Payments if Paid: This option is suitable when you intend to close a sales order with an associated invoice, which is common in scenarios like drop shipping.
Here is a summary of the steps on how to go to Transaction types in Connex:
- From the Connex dashboard, click on Settings in the top menu.
- On the left-hand side, click on the Selling channel that you want to manage.
- Click on Order Settings.
- Click on Orders to QuickBooks.
- Under Manual Sync and Marketplace Settings, click on Transaction Type.
- Select the transaction type that you want to manage and click Save.
Chart of Accounts
Connex creates non-inventory parts and QuickBooks requires accounts. If you instruct Connex to make inventory items, then Connex must map the item asset and COGS field. For the first four drop downs, here are the accounts we map:

Here is a field mapping:
| Connex | QuickBooks |
| Item Asset Account | When creating new products, this is the item asset account. The field is only used, if you instruct Connex to make new inventory parts. By default, Connex makes no new inventory items. |
| Item COGS Account | When creating new products, this is the item COGS account. The field is only used, if you instruct Connex to make new inventory parts. By default, Connex makes no new inventory items. |
| Item Income Account | When creating new products, this is the item income account. This field is used to make new discounts and shipping methods in QuickBooks. |
| Item Discount Account | When creating new discounts, this is the item income account. |
| Accounts Receivable Account | When creating invoices or credit memos, this field is used to map the A/R account. Only needed for invoices or credit memos. |
| Deposit Account | Used to deposit sales into an asset or an undeposited funds account in QuickBooks. This field is mandatory. |
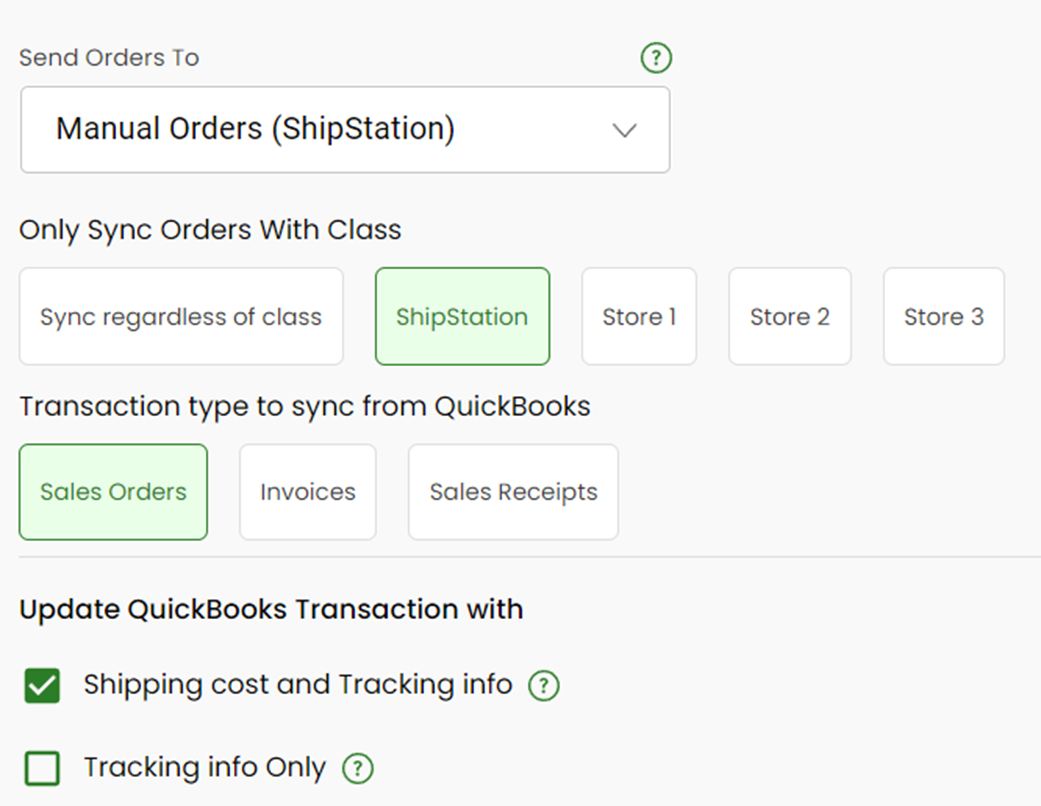
Step 2: Sync Orders from QuickBooks
Connex performs sales sync when the "Sync orders from QuickBooks to ShipStation" setting is enabled in the "Orders from QuickBooks" settings.
This ensures that your shipping data is always up-to-date and that you can easily fulfill orders from ShipStation.
🔷 Next: Advanced Settings