- Connex Ecommerce Analytics
- Selling Channels
-
Connex Ecommerce User Guide
- Getting Started with Connex Ecommerce
- Remote Desktop (RDP)
- Customers Matching
- Inventory Site
- Inventory Sync
- Multicurrency
- Orders
- Price Levels
- Products
- Refunds
- Sales Tax
- Sales Orders
- Unit of Measure
- Web Connector
- Getting Started with Rules
- Rules Engine Common Rules
- FAQ
- Deposit Match
- Cost of Goods Sold
- Troubleshooting
- Custom Store
- Billing
-
Connex Ecommerce Analytics
-
Frequently Asked Questions
-
General Troubleshooting Guide
- Deposit Match Troubleshooting
- QuickBooks Desktop Error Messages
- Inventory Troubleshooting
- Incorrect Orders Troubleshooting
- Sales Tax Troubleshooting
- Web Connector Troubleshooting
- QuickBooks Online Error Messages
- Match Deposit Tool Troubleshooting
- Product Matching Troubleshooting
- Customer Matching Troubleshooting
- Rules Engine
- Orders from QuickBooks
- Payments Troubleshooting
- Company File
-
Connex Ecommerce Integrations Guide
- Acumatica
- Amazon
- Amazon Settlement Report
- Bigcommerce
- CIN 7
- ERPAG
- FreeAgent
- Freshbooks
- Hubspot
- Keap
- Launchpad
- Magento 2
- Microsoft Dynamics 365
- Netsuite
- Odoo
- Paytrace
- Salesforce
- ShipBob
- ShipRush
- ShipStation to QuickBooks
- From QuickBooks to ShipStation
- Sage Business Cloud Accounting
- Sage Intacct
- ShipHero
- ShipWorks
- Shopify
- Square
- Stripe
- Veeqo
- Walmart
- WooCommerce
- Xero
- Zoho Books
- SPS Commerce
-
Rules Engine Guide
How do I install Bigcommerce on the Connex Ecommerce Analytics?
A step by step guide on installing Bigcommerce
How do install?
Our software can be installed through API accounts area in Bigcommerce. Here are the steps:
- Login to your BigCommerce store.
- On the left, click settings.
- Scroll down and click store-level API accounts:

- Click create API account.
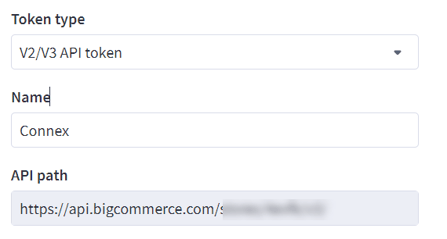
- Select create V2/V3 API token.
- In the name field, enter Connex.
- Copy the API path onto note pad. It is used later in Connex:

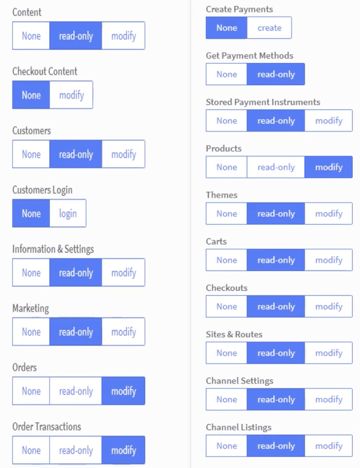
- You will see options that say none, read-only, or modify. Give read only access to all areas and modify access to order and product. If asked to choose between none and modify, select modify. Connex should have at least read only access to all areas of your site.

- Click Save.
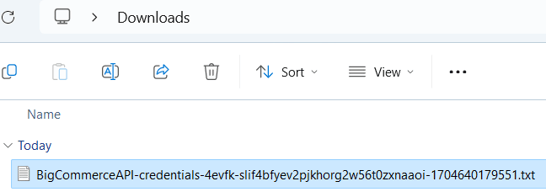
- Open the text file that appears in your downloads folder:

- On a separate browser tab, log into Connex Inventory Planner.
- Click connections on the top right.
- Choose Bigcommerce.
- Copy the values from the text file into Connex.
