Sync orders from QuickBooks Online to ShipStation
How to set up the sync and pull your first order
Is there a video?
Here is a demo:
How do I configure orders from QuickBooks to ShipStation?
We recommend adding a new ShipStation connection that just syncs orders from QuickBooks:
- Add ShipStation to Connex.
- On the install wizard, choose sync orders from QuickBooks.
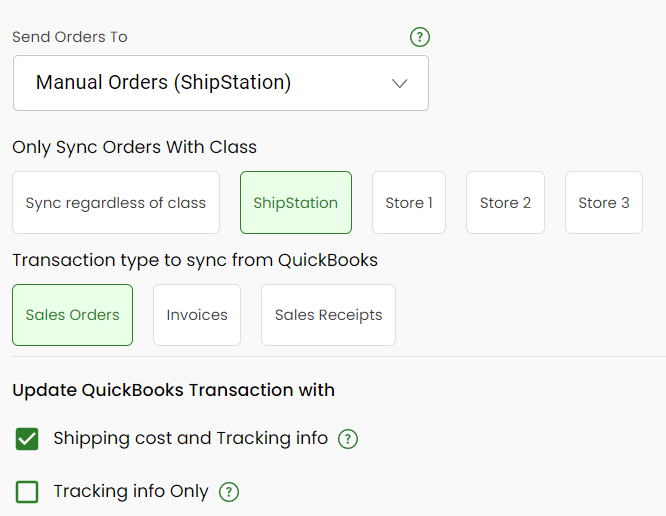
- In the wizard, choose the store in ShipStation to send orders. Then, choose a filter to sync orders. Finally, choose a transaction type.
Here is the end result:

Once you have completed these steps, you should begin receiving orders from QuickBooks to your ShipStation, whenever your sync runs again.
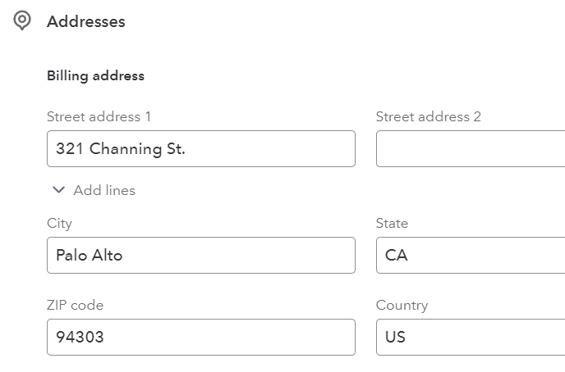
What is the proper address format in QuickBooks Online?
In QuickBooks Online, fill out the billing and shipping address for the customer. When you create an order, QuickBooks will copy the details to the page:

How do I sync the order from QuickBooks Online?
Enable class mapping
This assumes you want sales with a class of ShipStation to sync. If you want to sync invoices regardless of class, skip this section.
- In QuickBooks, click the gear on the top right.
- Click account and settings.
- Under advanced, enable class tracking under categories.
Create Sale
Here are the steps:
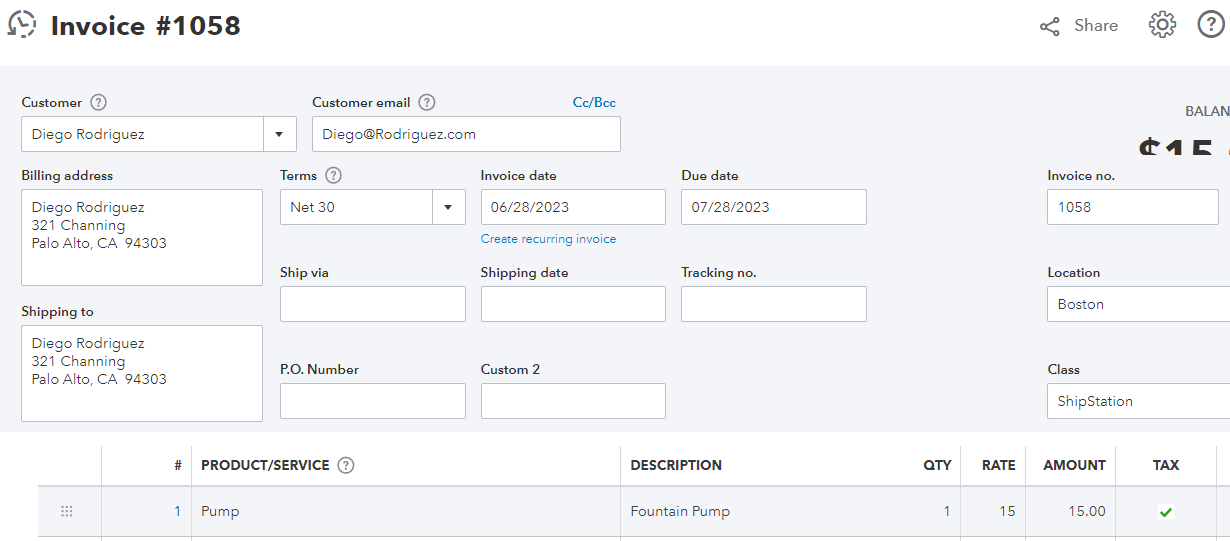
- In QuickBooks Online, click sales > all sales > new transaction > invoice.
- In the class field, enter ShipStation. If you sync regardless of class, leave this field empty.
- Choose a customer.
- Add the line items:

- Click save.
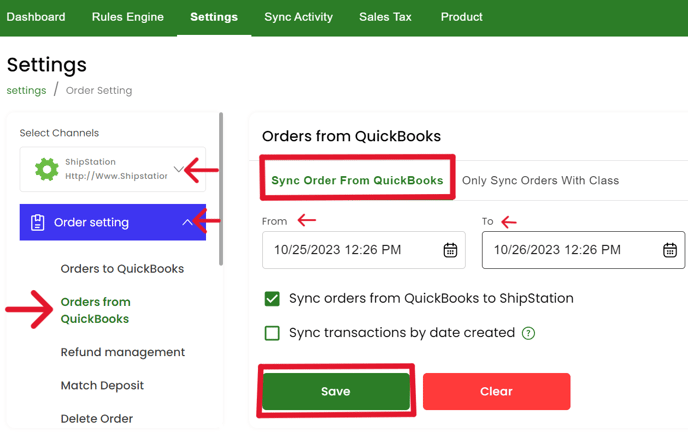
- Login to Connex for QuickBooks.
- Next to ShipStation, click manual sync.
- Under orders from QuickBooks, enter the order number.
- Click submit.
- Refresh ShipStation in a few minutes to find the sale.

![Connex_Logo_HelpCenter_100h.png]](https://help.connexecommerce.com/hs-fs/hubfs/Connex_Logo_HelpCenter_100h.png?height=50&name=Connex_Logo_HelpCenter_100h.png)