How do I locate custom fields in QuickBooks Online?
We can only sync to the first three custom fields in QuickBooks Online. In this example, we see both fields because they are in positions 1 - 3.
If you need fields in the 4th or higher, we recommend using the QuickBooks private notes field.
- Login to QuickBooks Online.
- In search, enter custom fields.
- You will see a list like this:

The custom field names are Sales Rep and P.O. Number. We support fields of type text and number only.
What if my fields are in positions 4 or higher?
We recommend using the field message displayed in statement, which we call private notes. The field with 3/16/2026 is readable.

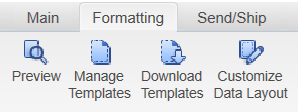
How do I locate custom fields in QuickBooks Desktop?
To use these fields, follow these steps:
- In QuickBooks, open an invoice.
- Click the manage tab and click customize data layout:
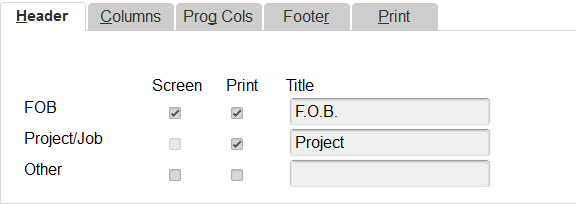
If you see your field names in other or FOB, then you are using a predefined field.
How do I bind custom field to custom field?
In this example, we want to map a custom field called Shop Name to a QuickBooks custom field called Ship From.
Add Custom Field to QuickBooks Desktop
Here are the steps:
- In QuickBooks, click customers on the top menu.
- Select customer center.
- Open a customer.
- Click additional info.
- On the right, click define fields.
- In the dialog, enter the custom field name and check the customer box. In this example, create a custom field called Ship From. We recommend free text as the data type. If you want to use a drop down list as a custom field, your custom field value must exist. In this example, we will send Post Cap Depot in the Cust Class custom field. If we sent ABC, then the sync would fail.

View a list of custom fields to map
- Login to Connex.
- On top, click rules engine.
- Click the order previewer button.
- Click order previewer.
- Fill out the search form to view your sale. If you use Shopify or WooCommerce and the order number fails to return the proper sale, use the date range search.
- Click the eye icon.
- Scroll down to custom fields. In this example, there is a field called Shop Name:

Add Rule
Here are the steps:
- Go to the Connex for QuickBooks rules engine.
- Click add new rule.
- Scroll to the bottom and select add rule without order number.
- Click next.
- Enter a sample name.
- In the rules area, enter these values:
- Action is map custom field.
- For the rule, enter CustomField, MapAll and Shop Name. This rule instructs Connex to map a custom field called Shop Name.
- In the value which needs to be updated, enter Ship From. This is the custom field name in QuickBooks.
Here is the end result:

How do I map a field like sales rep to a custom field?
In this example, we will map the field sales rep to a QuickBooks custom field called sales rep. Since the Connex sales rep field is static, like order number, you must add these values:
- Action is map custom field
- Conditions are sales rep, map all and enter sales rep.
- As the value to change, enter sales rep.
Sales Rep map all tells Connex to map the sales rep field to the custom field. If all conditions are true is the custom field name in QuickBooks.

How do I map a custom field from my accounting system to a custom field in a selling channel?
In this example, we will map a QuickBooks custom field called patient to ShipStation custom field 1:
- In the rules engine, choose the action map custom field.
- In rules, enter these values: custom field, wildcard, Patient. This rule says pull the patient field from QuickBooks.
- In the last textbox, enter CustomField1. This is where Connex will map the field.